– Dalya Rubin
– Dalya Rubin
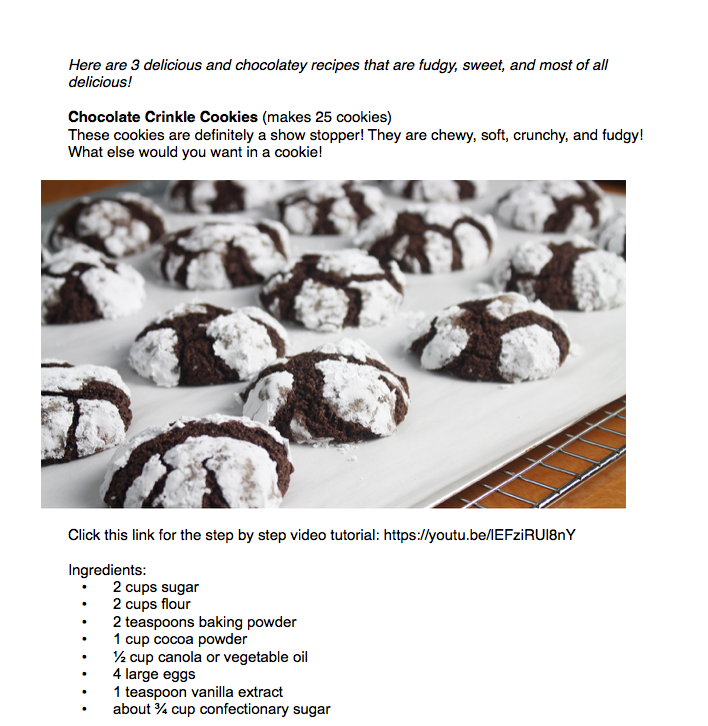
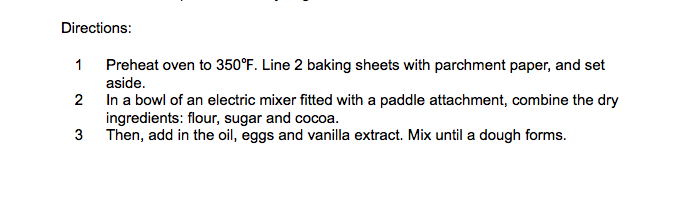
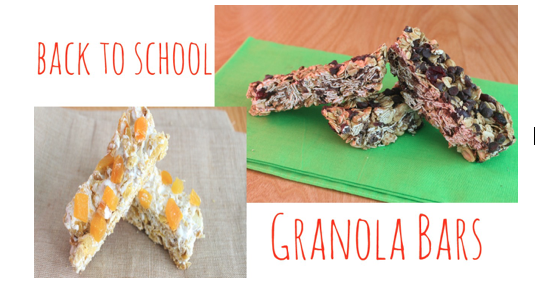
Here are two amazing Granola Bar recipes that are perfect to make at home in the beginning of the week and then take to school each day! They are a delicious sweet treat!
Watch the how-to videos here:
Picture by: Dalya Rubin
Trail Mix Granola Bar:
2 1/2 cups old fashion oats
1/2 cup peanut halves
1/3 cup honey
1/4 cup unsalted butter
1/4 cup light brown sugar
1/2 teaspoon vanilla extract
1/4 teaspoon salt
1/2 cup dried cranberries (aka: Craisins)
1/2 cup plus two tablespoons chocolate chips
Preheat the oven to 350 degrees F. Place the oats on a cookie sheet lined with parchment paper. Bake for ten minutes until lightly toasted.In a medium microwave safe bowl combine the honey, butter, brown sugar, vanilla and salt. Microwave on 15 second intervals, stirring in between, until the butter is melted and the mixture is very hot. In a separate bowl mix together the toasted oats, peanuts, and dried cranberries. Pour the hot butter mixture over the top and let cool for 5 minutes. Then, add in 1/2 cup of chocolate chips and mix until combined. Grease and line a 9 inch square pan with parchment paper. Pour the oat mixture into the pan and press down with a rubber spatula or pancake spatula. Sprinkle on the remaining chocolate chips and press down. Cover the pan with plastic wrap and refrigerate for at least two hours. Remove the large bar from the pan and cut into rectangles. This can be stored in the fridge for up to 1-2 weeks.
Honey Bunches of Oat Apricot Granola Bars: (Adapted from: lovelylittlekitchen.com)
4 tablespoons butter
1, 14 oz container Marshmallow Fluff
1/2 teaspoon salt
1, 14 oz box Honey Bunches of Oats with Almonds
2/3 cup chopped dried apricots
1/4 cup white chocolate or white chocolate candy melts
In a large pot over medium heat, melt the butter until it comes to a boil (**Don’t let it burn)! Then, remove the marshmallow fluff lid from the container and microwave for 15 seconds. Remove the plastic and spoon the fluff into the butter. Add in the salt. Mix this for 2-3 minutes until combined. Fold in the cereal and dried apricots into the butter-marshmallow mixture. Transfer the contents of the pot into greased and PARCHMENT LINED 9×13 inch pan and press it down with a rubber spatula or pancake spatula. Sprinkle with the remaining chopped apricots. Then drizzle on melted white chocolate. Cover the pan with plastic wrap and refrigerate for at least two hours. Remove the large bar from the pan and cut into rectangles. This can be stored in the fridge for up to 1 weeks.
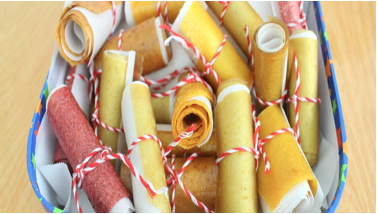
Learn to make a ONE INGREDIENT, and therefore, SUPER EASY Fruit Leather! It is a super healthy snack to bring to school and get your day started right!
Check out the how-to video here: https://youtu.be/ibt0g0ZzL5o
Picture by: Dalya Rubin
Fruit Amounts (these are estimates):
2 peaches= 3 fruit strips
2 mangos= 4-6 fruit strips
1 cup strawberries= 4-6 fruit strips
1 cup unsweetened applesauce= 3 fruit strips
You can for sure sue kiwi, papaya, or any other fruit you like!
Thanks!
-Dalya Rubin
Summer is one of the best seasons of the year! The food is great, and days are full of fun! Fortunately, everyone must eat tons of icicles in order to keep themselves hydrated because of the heat. Here are some recipes for those awesome, long hot days.
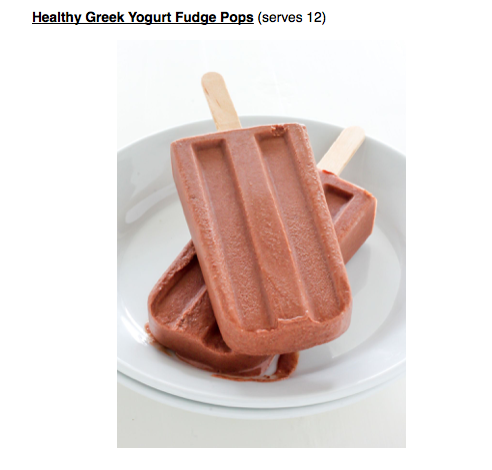
Recipe and photo Credit to: backbynature.com
These Popsicles are great for a day at the beach or pool!
Ingredients:
1 1/2 cups chocolate chips
1 cup chocolate milk (almond milk can be used)
2 teaspoons vanilla
1 1/2 cups Vanilla Greek Yogurt
Directions:
In a small saucepan over medium in low heat, melt chocolate chips until smooth. Then add in milk and increase the heat to medium. Bring to a slight boil. The. Remove from heat and cool for 5 minutes.
Whisk in vanilla and Greek yogurt until incorporated.
Pour the chocolate mixture into Popsicles molds and place in the freezer for one hour. Then, remove from the freezer and place the Popsicle sticks inside and freeze for another 5 hours.
Healthy Tuna Salad Wraps (makes about 1-2 wraps)
It is important to have a well balanced healthy diet with a ton of protein! Here is a delicious recipe you will crave over and over!
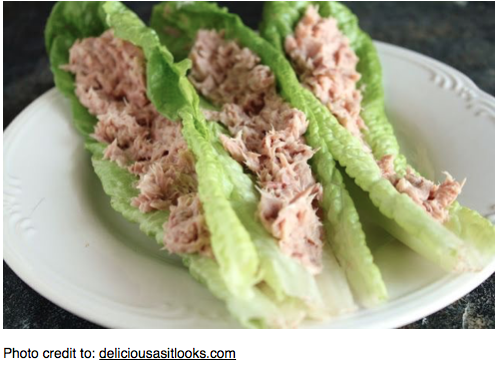
Ingredients:
1 can solid white albacore tuna
1/4 cup chopped celery
1/4 cup red onion
2 tablespoons mayo (or 1/3 mashed avocado)
1 teaspoon red wine vinegar
Salt and pepper
Romaine lettuce
Directions:
Combine tuna, celery, onion, mayo, red wine vinegar, pinch of salt and pepper. Mix until combined.
Spoon tuna into lettuce stalks. Fold the sides of the lettuce over and eat it like a wrap!
Best Ever Avocado Egg Salad (1 serving)
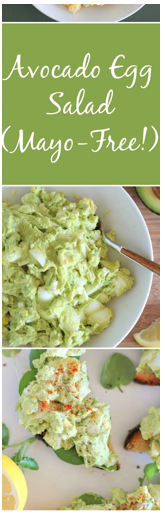
Eggs are an amazing cheap and healthy protein! This delicious egg salad combines the perfect amount of protein and fat to fuel your day.
Eggs are an amazing cheap and healthy protein! This delicious egg salad combines the perfect amount of protein and fat to fuel your day.
Photo credit to: theroastedroot.com
Ingredients:
2 hard boiled eggs
1/2 avocado, mashed
Pinch salt, pepper
Sprinkle garlic powder and onion powder
Directions:
Mash both eggs in a bowl until small chunks form. Add in the avocado, salt, pepper, garlic powder, and onion powder.
Serve over a salad, spinach, in a wrap or on its own!
Enjoy the summer!
By: Dalya Rubin
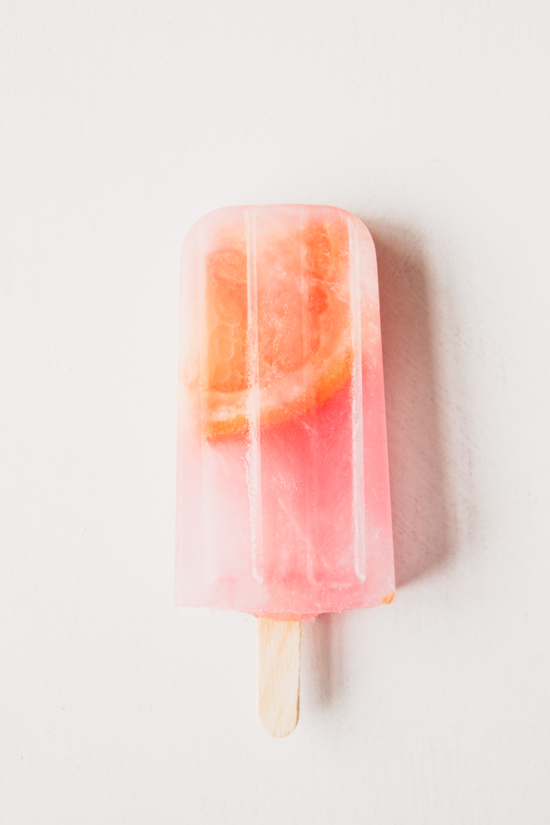
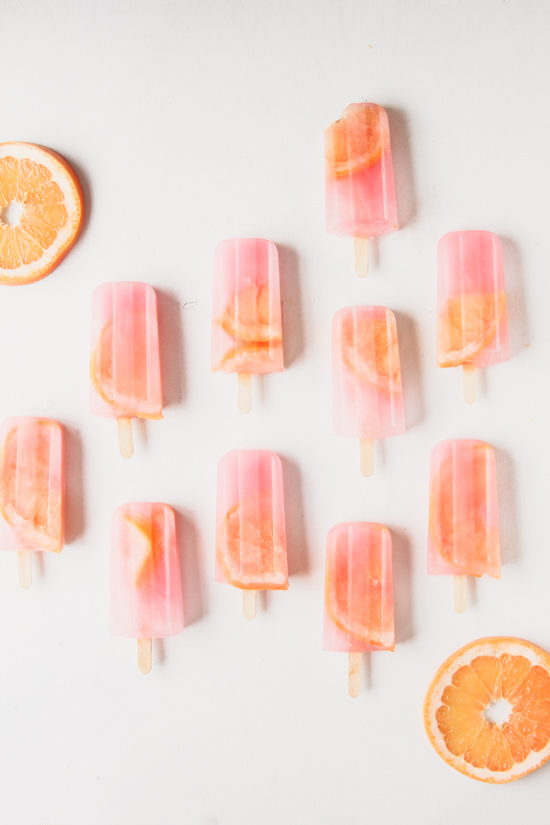
Summer temperatures can often get in the high nineties, especially in Florida! If you want a cold treat, but you don’t want to waste your calories on ice cream, try these light Popsicles instead!
You’ll need a Popsicle mold for these, if you don’t have one, you could improvise with an ice-cube tray & make flavored ice cubes to throw in plain water.
Ingredients: grapefruit juice (try not to get the super sugary kind) , Pink Lemonade or any light (clearish) fruit juice & a slice or two of fresh grapefruit per popsicle.
– First place your slice(s) of fresh grapefruit juice into each Popsicle mold
– Next mix the grapefruit juice and the fruit juice of your choice
– Pour your mixture into each Popsicle mold
– Put these in the freezer for about a half an hour
– Take the mold out of the freezer and add the Popsicle sticks to each Popsicle
– Freeze for about 3 more hours or until hard
– To get the Popsicles out of the mold, run the mold under warm water until they are able to pop out
Enjoy!
By: Shirin and Sara Khambalia
Hi everyone, and welcome back to a new segment of Storm Style‘s Lifestyle section! If you have come here, you are in for a real treat. The theme for this Spring’s cooking edition is “Three Ingredients Or Less Snacks/Desserts.” Each recipe included is healthy, easy, and quick to make!
Recipe #1: DIY Smoothie
Ingredients:
Instructions:
Place all ingredients in a blender, and blend until completely combined.
Recipe #2: Baked Apples
Ingredients:
Instructions:
Spray a pan with baking spray. Place the apples inside. Poke holes in each apple using a fork to prevent them from bursting. Then sprinkle cinnamon over each apple. Bake at 350 degrees F for about 2-3 hours until the apples have become soft and mushy.
Recipe #3: Meringues
Ingredients:
7 egg whites
2 cups sugar
Pinch of Cream of Tartar
Place egg whites, sugar, and cream of tartar in a bowl with an electric mixer, fitted with the whisk attachment. Beat on medium-low speed for 2-3 minutes. Then up the speed to medium-high and beat for another 5-8 minutes until stiff peaks form. Using a tablespoon, scoop spoonfuls of the batter onto a cookie sheet lined with parchment paper. Bake at 275 degrees F for about 3 hours.
***The more you bake them the crunchier they will get. If you like your meringues totally firm, bake them for another 2 hours.
Lunch/Dinner
Cheese-less “Cheese” Lasagne
During the winter time, it can be a bit hard to make smart food choices because of all the delicious Starbucks drinks, hot chocolates, and warm Mac n Cheese. The recipe below embodies all things winter but at the same time includes some healthy elements too. I present Cheese-less, gluten-free, “cheese” Lasagne. Although this recipe has some healthier components, I promise that this recipe tastes exactly like real Lasagne, but it is better for you and is beneficial to those with food allergies. This cheese sauce recipe is credited to Youtuber, Ingrid Nilsen.
Serves: 3-4 people
Ingredients:
Directions:
**I recommend doubling the entire recipe if this dish is being served for a family of four for dinner.
**You can also add any vegetables of your choice if you would like.
***No other yeast can be substituted for nutritional yeast!
Desserts
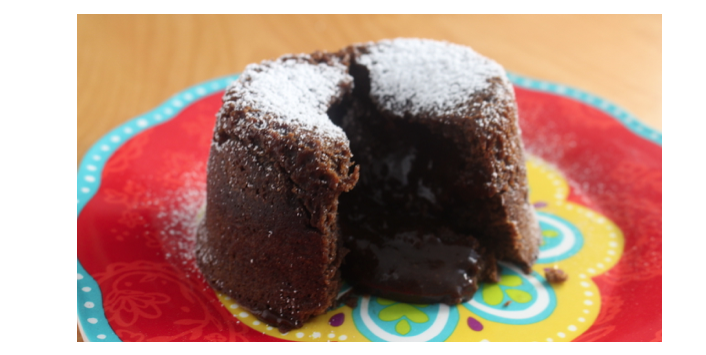
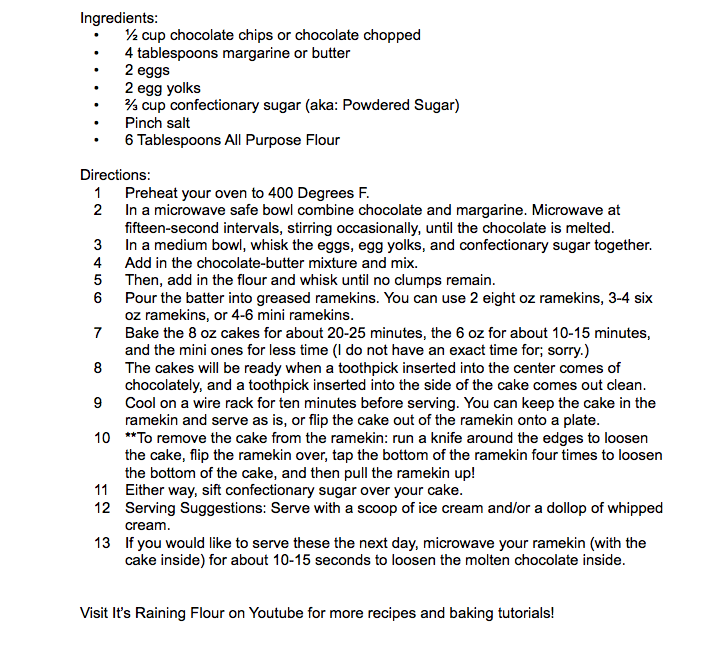
Molten Chocolate Lava Cake
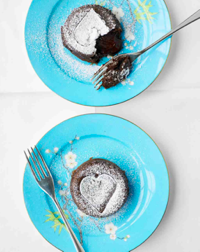 Since the winter is approaching and will soon be gone (here in sunny Florida), it is only appropriate that we welcome Molten Chocolate Lava cakes into our “cold” month. These small cakes are easy to prepare and taste restaurant-worthy. Within each cake lies a gooey center, surrounded by an outer layer of moist chocolate cake. Don’t be intimidated by its name; Lava cake takes about 10 minutes to prepare and is SO worth it!
Serves: 2
Ingredients:
Directions:
***This recipe is from Martha Stewart. Although the picture above is from Martha Stewart’s website, I have made this recipe many times and the cakes come out looking just like the picture above.
<3 – Dalya Rubin
Easy and Healthy Back to School Snacks and Breakfasts
Why not start off the school year feeling healthy and looking good? Here are some delicious, nutritious, easy recipes that will keep you energized and fit throughout the year.
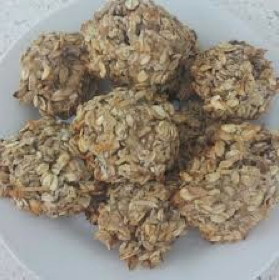
Super Healthy Chocolate Chip Cookies (1-2 servings)
1 banana
1 cup quick cooking oats or rolled oats
2-3 tablespoons dark chocolate chips
1 teaspoon chia seeds (optional)
3-4 tablespoons slivered almonds (optional)
Preheat oven to 350 degrees F.
Using a fork, mash the banana until it is soft and mushy. Then add in the oats, chocolate chips, chia seeds, and almonds. Using your hands, mix everything together until completely combined.
Line a medium baking sheet with parchment paper and spoon 10-12 tablespoons of batter onto the baking sheet. **You may have to shape the cookies with your hands, depending on the consistency.
Bake in oven for 8-15 minutes. Eat cold, at room temperature, or straight out of the oven.
Although this recipe may be high in calories, it is super high in protein. There are 16 grams of protein in this whole recipe! You are basically eating a whole meal in 12 cookies!
3 Ingredient Pancakes (1 serving)
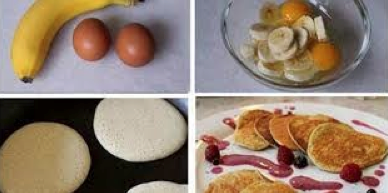
1 banana
2 eggs
Pure maple syrup (optional)
Fruit (optional)
Place a pan on the stove and turn the temperature to medium-low heat. In a blender, combine the banana and eggs until frothy. Spray the pan with a nonstick baking spray. Once your pan has heated up for a few minutes, use a medium-sized ladle and spoon the batter onto the pan. Wait 1-2 minutes until the pancakes start to bubble. Carefully flip the pancakes and allow to cook for another 30 seconds to a minute. **If your pancake starts to break when flipping, it is not ready to be flipped.
Repeat the process with the remaining batter. When ready to eat, serve with maple syrup and fruit.
Chia Seed Pudding (1 serving)
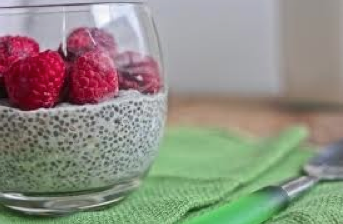
1 banana
3 tablespoons chia seeds
3/4 cup almond milk (or regular milk)
1 teaspoon vanilla extract
pinch cinnamon
fruit (optional)
slivered almonds (optional)
Mash the banana in a medium bowl. Then whisk in the chia seeds, milk, and vanilla. Cover the bowl and refrigerate over night. Before eating, whisk again for 1-2 minute to combine all the ingredients. Sprinkle with cinnamon and top with fruit and nuts.
Benefits of Chia Seeds, Almond Milk, Bananas, and Cinnamon
Chia Seeds:
Almond Milk:
Bananas:
Cinnamon:
– Dalya Rubin