– Sara Khambalia
– Sara Khambalia
Enjoy the fall time the right way with this super cute easy to make fall favorite!
DIY Mini Pumpkin Candles

What you’ll need:
Step 1: Cut off the top of the pumpkin.
Step 2: Scoop out all the flesh and seeds from inside. Make sure the inside is clean.
Step 3: In a large pot, melt the wax on a low flame. Stir the wax with a spoon until it’s completely melted.
Step 4: Stir in drops of your favorite scent. Stir until the mixture is of a slurpee consistency.
Step 5: Glue the wick into the center of the pumpkin.
Step 6: Carefully pour the melted wax into the pumpkin. Fill 3/4 of the pumpkin with the wax.
Let the candle harden and give it at least 24 hours before lighting it.
-Sara Khambalia
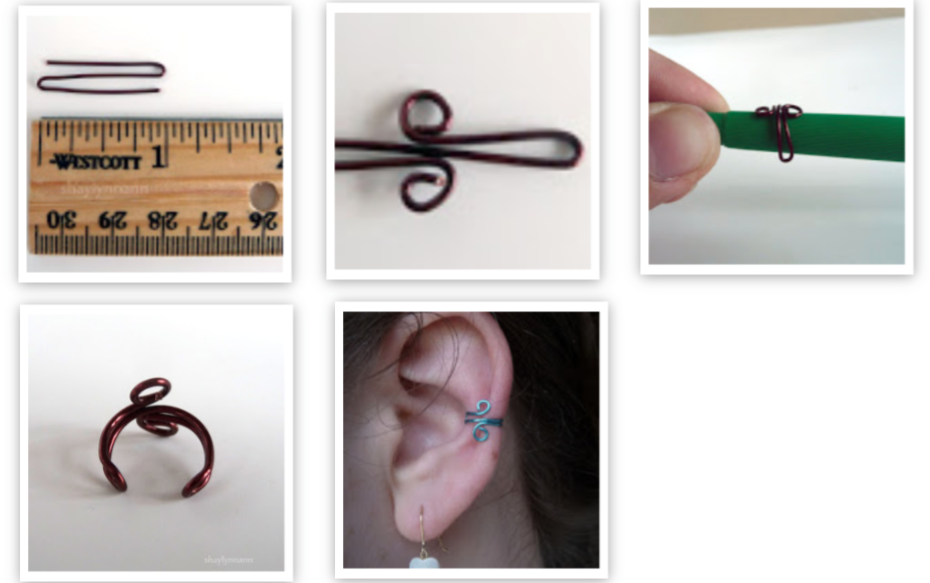
These are such a great alternative to earrings for those who don’t have piercings! All you need is pliers and some wire!
Start with three inches of wire.
Step one: fold the wire at one inch and then fold again in the opposite direction creating a zig-zag
Step two: twist the end into swirls and pinch the swirls until they touch the center wire (don’t pinch zig-zags in a straight line because they’ll be uncomfortable on the ear)
Step three: find a felt tip marker or a pen cap and fold the wire around it (use different pen/marker sizes to fit your ear)
step four: curve the ends in using pliers
And voila! You have a new and totally cute ear cuff that doesn’t poke a hole in your ear — or your wallet!!
– Shirin and Sara Khambalia
Winter is the perfect time to get creative and do some fun, easy DIY projects! During those cold January days, you may find yourself going through tubes of lip balm to keep those chapped lips hydrated. Follow these simple steps in order to make your own moisturizing gloss!
What you’ll need:
Let’s get to it!
1. Place the bowl onto the stove on medium heat
2. When the bowl is evenly heated, add one tablespoon of petroleum jelly
3. When the petroleum jelly is semi-melted, add food coloring of your choice (Use colors such as red, pink, maroon, purple)
4. After the mixture is fully melted, add a teaspoon of shea butter This will provide moisture for your lips.
5. When the whole mixture is melted, quickly pour into a container
6. Store in the fridge! Use when the balm hardens a bit.
By: Sara and Shirin Khambalia
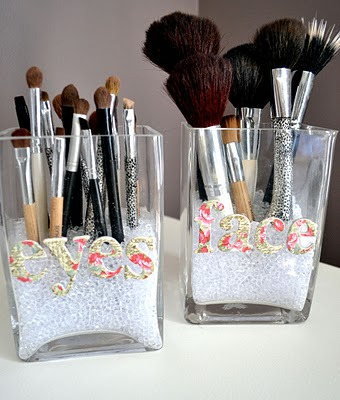
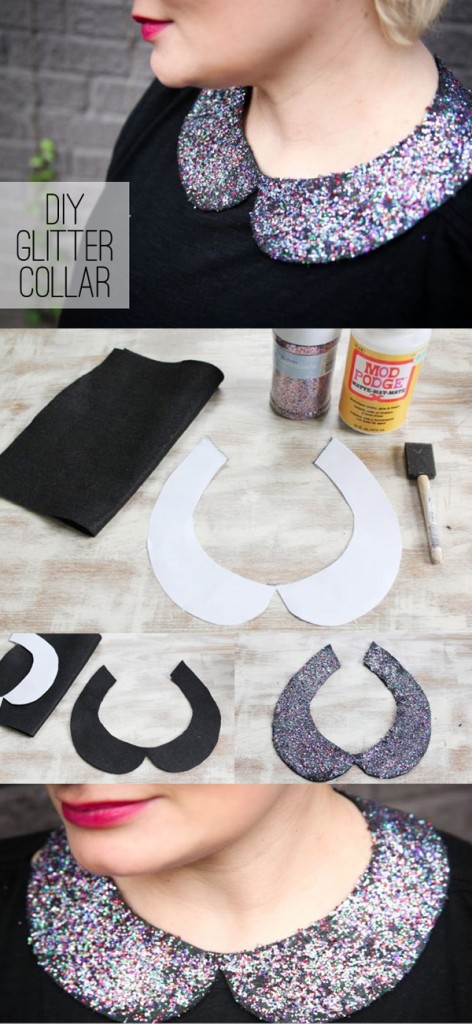
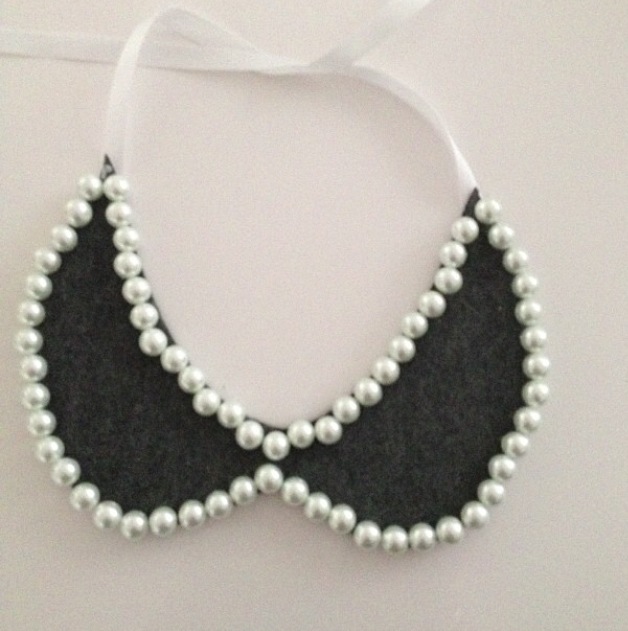
DIY Fashion can be so much fun! These are creative, easy, and fashion-forward ideas you can try at home! Try making these awesome containers to hold your make up brushes with style and ease. Decorate a collar for one of your shirts, and spice up a plain tee while guaranteeing a tznius neckline!
BE SURE TO CHECK OUT THE FUNKY COLLAR BELOW, CREATED BY ONE OF OUR VERY OWN StormStyle writers!
– Shuli Mayer, Rachel Gittler, Esti Simon, & Ashley Galitzer